

Easter is almost here!! This week is Spring Break and I’ve been watching my niece and nephew while my brother and sister in law are away. So, I recruited their help along with my 2 kids to come up with some easy Easter DIY Projects. Crafts with 4 kids under the age of 6 can be challenging and messy, but it’s also pretty fun. Here are some of the projects we did!
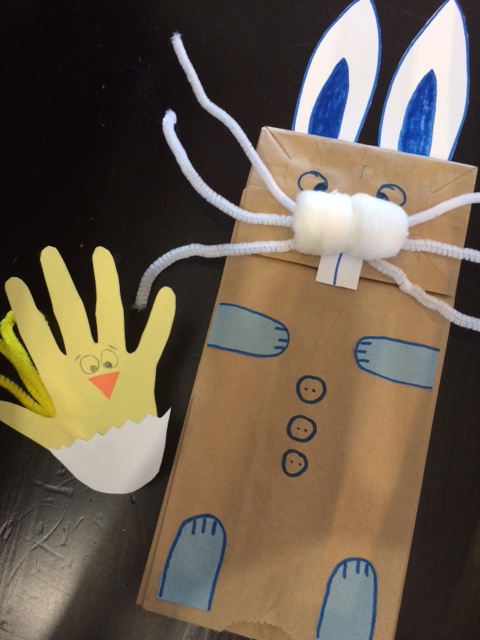
Easter Bunny Puppet
Supplies:
- Brown paper bag
- 2 Cotton balls
- White & Coloured construction paper
- Pipe cleaners
- Markers (you can also use craft eyes and buttons for some of the objects I drew on with the marker)
- Scissors
- Glue
Directions :
- Twist 3 pipe cleaners (I used 3 white ones) together to make whiskers. Glue these on to the flap of the brown paper bag
- Glue 2 cotton balls on top of the middle of the whiskers (where they are all connected)
- Draw on eyes (or use craft googly eyes)
- Cut out a small rectangle on white paper and draw a line down the middle. Glue this on under the cotton balls and whiskers as teeth
- Cut 2 ears out of the white paper. You can either draw in the inner part, or cut it out of colour construction paper
- Draw 2 pairs of hands and 2 pairs of feet in coloured paper. Cut them out and glue them on the body of the brown paper bag
- Draw on some buttons (or use real ones if you have them!)
Your craft is now ready to play with!!!
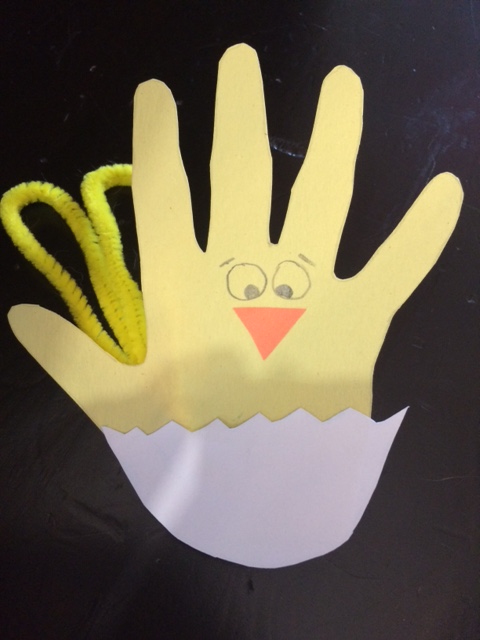
Traced Hand Spring Chick
Supplies:
- White and Yellow construction paper
- 2 Yellow pipe cleaners
- Marker
- Glue
- Scissors
Directions:
- Trace your hand (I used my 4-year-old daughters) on the yellow paper and cut it out
- Draw on 2 eyes (or use craft eyes) between the middle and ring fingers
- Fashion 2 wings out of pipe cleaners and glue on to the back of the hand sticking out between the thumb and pointer finger
- Draw half of an egg with cracks on the top edge and glue the hand-traced chicken into the egg
- Super cute and super easy! My kids liked this one!
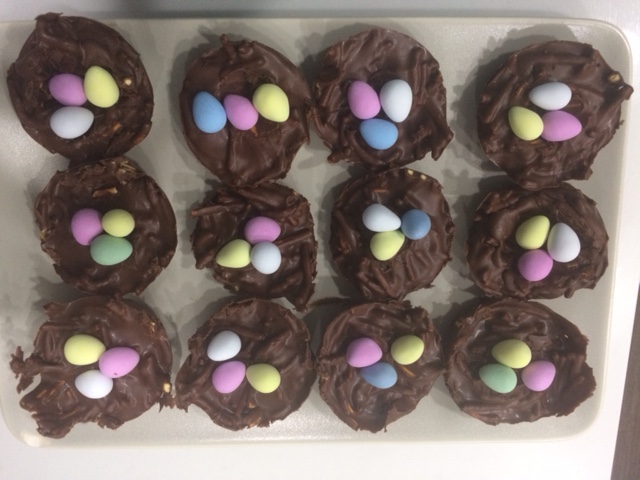
Chocolate Mini Egg Nest Treats
Supplies:
- Cadbury Mini Eggs
- 2 Cups Chow Mein Noodles
- 1 Cup Milk Chocolate Chips
- 1 Cup Butterscotch Chips
- Parchment paper
- Cookie tray
Directions:
- Melt the chocolate and butterscotch chips over low heat in a pan (or you can use the microwave)
- Mix the chow mein noodles into the melted chocolate
- Arrange the mixture onto a parchment lined cookie tray into approximately 12 “nests” that will hold about 3 eggs each
- Put the “nests” into the fridge until almost solidified
- Add eggs into the nest, pushing in slightly
- Return to the fridge to finish solidifying
Eat!!!! These are amazingly delicious. You might want to make a double batch because they go fast, especially if you have company. My kids got covered in chocolate, but they had a ton of fun!
Easter Wreath
Supplies:
- White paper plate
- Egg cut outs (either you can decorate them ahead of time, or you can let your kids decorate them)
- Glue
Directions
- Cut the middle out of a paper plate
- Glue the paper egg cut outs around the outer ring
- Hang
You can add other decorations to this one. Use your imagination. You can add some coloured feathers, or pompoms; whatever you want. This one is easy to do a more “adult version” of as well. You can either do it on a twig wreath or a foam wreath. I like to wrap my foam wreaths in yarn before I decorate them.
Bunny Rabbit Nose Mask
I haven’t made this one yet, but I want to try it with my kids yet before Easter. Its really cute and easy to make as well. And seeing as my kids love playing dress up, this is right up their alley!!
Supplies:
- Popsicle sticks
- Paint
- White paper
- 2 white craft pompoms (large) and 1 smaller coloured one
- Scissors
- Glue
- Black marker
- White pipe cleaners
Directions:
- Paint the popsicle stick the colour of your choice
- Cut out rectangle on white paper about the width of your popsicle stick. Draw a black line down the middle to make it look like 2 front teeth
- Glue teeth on to popsicle stick
- Glue 3 pipe cleaners on top of teeth as whiskers
- Glue the 2 white pompoms on top of the whiskers and the little coloured one on the top as the nose
Now you’re ready to hop around like a bunny!! I can picture my kids singing and dancing around with these!!
Painted Cross
Supplies:
- Paper or cardboard (I used cardboard because my kids like to use A LOT of paint! This keeps the paint from running through the paper)
- Paint and brushes
- Painters tape
Directions:
- Make a cross on your paper with the painter’s tape (I used 2 tape widths together)
- Give the kids some paint and let them have at it!!
- When the paint is dry, carefully remove the painter’s tape to reveal the cross underneath
You can also make Easter eggs or whatever other design you want with the tape. It comes out looking really nice.
There are so many other crafts and projects you can do with your kids for Easter! These are just a few! Check out Pinterest for some other great ideas (this is where I get most of my inspiration from!!) Or just use your imagination!